Hey there! As a supplier of Mini Roller Bearings, I've seen firsthand how important it is to use disassembly tools correctly. Whether you're a professional mechanic or a DIY enthusiast, getting the disassembly process right can save you a lot of time, money, and headaches. In this blog post, I'll share some tips on how to use disassembly tools for Mini Roller Bearings correctly.
Understanding Mini Roller Bearings
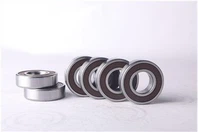
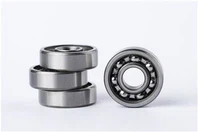
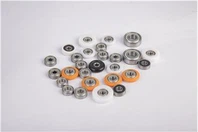
Before we dive into the disassembly process, let's take a quick look at what Mini Roller Bearings are. Mini Roller Bearings, as the name suggests, are small-sized bearings that are used in a variety of applications. They're designed to reduce friction between moving parts and support radial and axial loads. You can find them in everything from small motors and appliances to precision instruments. If you're interested in specific models, check out our 608 Roller Bearing, Mini Roller Bearings, and Micro Roller Bearings pages.


Why Correct Disassembly Matters
Correct disassembly of Mini Roller Bearings is crucial for several reasons. First, it helps prevent damage to the bearings themselves. If you use the wrong tools or techniques, you can easily scratch, dent, or otherwise damage the bearing surfaces, which can lead to premature failure. Second, proper disassembly makes it easier to inspect the bearings for wear, damage, or contamination. This allows you to determine whether the bearings need to be replaced or can be reused after cleaning and maintenance. Finally, correct disassembly ensures that you can reassemble the bearings correctly, which is essential for their proper functioning.
Tools You'll Need
To disassemble Mini Roller Bearings correctly, you'll need a few basic tools. Here's a list of the tools I recommend:
- Bearing Puller: A bearing puller is a specialized tool used to remove bearings from shafts or housings. There are different types of bearing pullers available, including two-jaw, three-jaw, and hydraulic pullers. Choose a puller that's appropriate for the size and type of bearing you're working with.
- Screwdrivers: You'll need a set of screwdrivers to remove any screws or fasteners that are holding the bearing in place. Make sure you have the right size and type of screwdriver for the job.
- Pliers: Pliers can be useful for gripping and removing small parts, such as retaining rings or snap rings.
- Hammers and Punches: In some cases, you may need to use a hammer and punch to gently tap the bearing out of its housing. However, be careful not to use too much force, as this can damage the bearing.
- Cleaning Supplies: After disassembling the bearings, you'll need to clean them thoroughly to remove any dirt, debris, or old lubricant. You can use a degreaser, a clean cloth, and a brush to clean the bearings.
Step-by-Step Disassembly Process
Now that you have the right tools, let's go through the step-by-step process of disassembling Mini Roller Bearings:
Step 1: Prepare the Work Area
Before you start disassembling the bearings, make sure you have a clean, well-lit work area. Lay down a clean cloth or mat to prevent the bearings and small parts from getting lost or damaged. Gather all the tools you'll need and have them within easy reach.
Step 2: Remove Any External Components
If there are any external components, such as covers, shields, or retaining rings, remove them first. Use the appropriate tools, such as screwdrivers or pliers, to remove these components. Be careful not to damage them, as you'll need to reinstall them later.
Step 3: Locate the Bearing
Once the external components are removed, locate the Mini Roller Bearing. It's usually located on a shaft or inside a housing. Take a close look at the bearing and its surrounding components to understand how it's installed.
Step 4: Use the Bearing Puller
If the bearing is pressed onto a shaft, you'll need to use a bearing puller to remove it. Attach the puller jaws to the bearing's outer race or the shaft, depending on the type of puller you're using. Make sure the puller is centered and securely attached. Then, slowly turn the puller's screw or operate the hydraulic pump to apply pressure and pull the bearing off the shaft.
Step 5: Remove the Bearing from the Housing
If the bearing is installed in a housing, you may need to use a hammer and punch to gently tap the bearing out. Place a punch on the edge of the bearing's outer race and tap it with a hammer. Be careful not to hit the bearing directly, as this can damage it. Instead, tap the punch at an angle to gradually loosen the bearing from the housing.
Step 6: Inspect the Bearing
Once the bearing is removed, inspect it carefully for any signs of wear, damage, or contamination. Look for scratches, dents, cracks, or discoloration on the bearing surfaces. Check the rollers and cages for any signs of damage or excessive wear. If you notice any problems, it's best to replace the bearing.
Step 7: Clean the Bearing
After inspecting the bearing, clean it thoroughly to remove any dirt, debris, or old lubricant. Use a degreaser and a clean cloth to wipe the bearing surfaces. You can also use a brush to clean the hard-to-reach areas. Make sure the bearing is completely dry before reassembling it.
Tips and Tricks
Here are some additional tips and tricks to help you disassemble Mini Roller Bearings correctly:
- Read the Manufacturer's Instructions: Before disassembling the bearings, read the manufacturer's instructions carefully. They may provide specific guidelines or precautions for your particular type of bearing.
- Take Pictures or Make Notes: If you're disassembling a complex assembly, take pictures or make notes of the disassembly process. This will help you remember how to reassemble the components correctly.
- Use the Right Amount of Force: When using tools such as hammers and punches, use the right amount of force. Too much force can damage the bearing, while too little force may not be enough to remove it.
- Store the Bearings Properly: After disassembling the bearings, store them in a clean, dry place. Use a container or a bag to keep them organized and protected from dust and moisture.
Reassembly
Once you've cleaned and inspected the bearings, it's time to reassemble them. Make sure you follow the reverse order of the disassembly process. Apply a thin layer of fresh lubricant to the bearing surfaces before reinstalling them. Use the appropriate tools to reinstall any external components, such as covers, shields, or retaining rings.
Conclusion
Using the disassembly tools for Mini Roller Bearings correctly is essential for their proper maintenance and longevity. By following the steps and tips outlined in this blog post, you can safely and effectively disassemble, inspect, clean, and reassemble Mini Roller Bearings. If you have any questions or need further assistance, don't hesitate to reach out. We're here to help you with all your Mini Roller Bearing needs. Whether you're looking to purchase new bearings or need advice on maintenance, we're just a message away. Start a conversation with us today to discuss your requirements and find the best solutions for your applications.
References
- "Bearing Installation and Removal Guide" - SKF
- "Miniature Bearing Handbook" - NTN Bearing Corporation of America