Hey there! As a supplier of Bearing 6001ZZ, I often get asked about the disassembly method for this type of bearing. So, I thought I'd put together this blog post to share some insights on how to disassemble Bearing 6001ZZ properly.
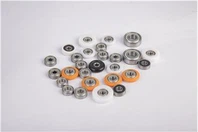
First off, let's talk a bit about Bearing 6001ZZ. It's a small-sized ball bearing that's widely used in various applications. You can find more details about it on our website Bearing 6001ZZ. This bearing has two metal shields (the "ZZ" in its name), which helps to keep contaminants out and retain the lubricant inside.
Now, why would you want to disassemble Bearing 6001ZZ? Well, there could be a few reasons. Maybe you need to clean it, inspect it for damage, or replace some of its components. Whatever the reason, it's important to do it the right way to avoid causing any additional damage.
Tools You'll Need
Before you start disassembling the bearing, you'll need to gather some tools. Here's a list of what you'll typically need:
- Press or Puller: A press or puller is used to remove the bearing from its housing or shaft. Make sure you choose the right size and type for the job.
- Screwdriver or Pliers: You might need a screwdriver or pliers to remove any retaining rings or clips that are holding the bearing in place.
- Cleaning Solvent and Rags: After disassembly, you'll want to clean the bearing components. Use a suitable cleaning solvent and some clean rags to do this.
- Safety Gear: It's always a good idea to wear safety glasses and gloves to protect yourself from any sharp edges or flying debris.
Disassembly Steps
Now, let's get into the actual disassembly process. Here are the steps you should follow:
- Prepare the Work Area: Find a clean, well-lit area to work in. Lay down a clean cloth or mat to prevent the bearing components from getting dirty or damaged.
- Remove the Retaining Rings or Clips: If there are any retaining rings or clips holding the bearing in place, use a screwdriver or pliers to remove them. Be careful not to damage the rings or clips.
- Use a Press or Puller: If the bearing is press-fitted onto a shaft or into a housing, you'll need to use a press or puller to remove it. Make sure the press or puller is properly aligned with the bearing and apply gradual pressure until the bearing is removed.
- Separate the Inner and Outer Rings: Once the bearing is removed, you can try to separate the inner and outer rings. Sometimes, they can be separated by hand. If not, you might need to use a small tool, such as a flathead screwdriver, to gently pry them apart. Be very careful not to damage the bearing components.
- Remove the Balls and Cage: After separating the inner and outer rings, you can remove the balls and cage. The balls are usually held in place by the cage. You can carefully remove the cage and then take out the balls one by one.
- Clean the Components: Once you've disassembled the bearing, it's time to clean the components. Soak them in a cleaning solvent for a few minutes and then use a clean rag to wipe them clean. Make sure to remove all the dirt, grease, and debris.
- Inspect the Components: After cleaning, inspect the bearing components for any signs of damage, such as cracks, pits, or excessive wear. If you find any damaged components, you'll need to replace them.
Reassembly
Once you've cleaned and inspected the bearing components, you can start reassembling the bearing. Here are the steps you should follow:
- Lubricate the Components: Before reassembling the bearing, apply a thin layer of lubricant to the inner and outer rings, balls, and cage. This will help to reduce friction and wear.
- Insert the Balls and Cage: Place the cage back into the outer ring and then insert the balls one by one into the cage. Make sure the balls are evenly spaced and properly seated.
- Install the Inner Ring: Carefully place the inner ring onto the shaft or into the housing. Make sure it's properly aligned with the outer ring and the balls.
- Press or Fit the Bearing: If the bearing is press-fitted onto a shaft or into a housing, use a press or other suitable tool to press it into place. Make sure to apply even pressure to avoid damaging the bearing.
- Install the Retaining Rings or Clips: Once the bearing is in place, install any retaining rings or clips that were removed earlier. Make sure they're properly seated and secure.
Tips and Precautions
Here are some additional tips and precautions to keep in mind when disassembling and reassembling Bearing 6001ZZ:
- Be Gentle: The bearing components are relatively delicate, so be gentle when handling them. Avoid using excessive force or applying too much pressure, as this can cause damage.
- Keep the Components Organized: As you disassemble the bearing, keep the components organized in a way that makes it easy to reassemble them. You might want to use a tray or container to keep the components together.
- Use the Right Lubricant: Make sure you use the right type of lubricant for the bearing. Using the wrong lubricant can cause premature wear and damage.
- Follow the Manufacturer's Instructions: If possible, refer to the manufacturer's instructions for disassembly and reassembly. They might have specific recommendations or procedures that you should follow.
Other Small Bearings
If you're interested in other small bearings, we also offer Small Bearings on our website. One of the popular models is the 6901ZZ --Thin Section Bearings/Floor Sweeper Motor. It's designed for specific applications and has its own unique features.
Contact Us for Purchasing
If you're in the market for Bearing 6001ZZ or other small bearings, we'd love to hear from you. We're a reliable supplier with a wide range of high-quality bearings. Whether you need a single bearing or a large quantity, we can meet your needs. Just reach out to us for a quote and let's start the purchasing discussion.


References
- Machinery's Handbook, 31st Edition
- Bearing Manufacturer's Technical Manuals