Removing pulley bearings safely is a crucial skill, whether you're a professional mechanic, a DIY enthusiast, or someone involved in industrial maintenance. As a supplier of high - quality pulley bearings, I understand the importance of this process and the potential risks involved if not done correctly. In this blog, I'll guide you through the steps to safely remove pulley bearings, ensuring that you can handle the task with confidence.
Understanding Pulley Bearings
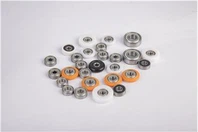
Before delving into the removal process, it's essential to have a basic understanding of pulley bearings. Pulley bearings are used to reduce friction between the pulley and the shaft, allowing for smooth rotation. They come in various types, such as ball bearings, roller bearings, and needle bearings, each designed for specific applications.
We offer a wide range of pulley bearings, including Industrial Roller Bearings, which are ideal for heavy - duty industrial applications. These bearings can withstand high loads and provide long - lasting performance. Door Bearing Wheels are another popular product in our catalog, designed for smooth and quiet operation of doors. And Sliding Gate Roller Bearings are specifically engineered to handle the unique demands of sliding gates.
Safety Precautions
Safety should always be your top priority when working with pulley bearings. Here are some essential safety precautions to follow:
- Wear Protective Gear: Always wear safety glasses to protect your eyes from flying debris. Gloves can also provide a better grip and protect your hands from sharp edges.
- Disconnect Power: If the pulley is part of an electrical system, make sure to disconnect the power source before starting the removal process. This will prevent any accidental startup and potential injuries.
- Use the Right Tools: Using the appropriate tools for the job is crucial. Using incorrect tools can damage the bearings or cause personal injury.
Tools Required
To remove pulley bearings safely, you'll need the following tools:
- Puller Set: A bearing puller is a specialized tool designed to remove bearings from shafts or housings. There are different types of pullers available, such as two - jaw, three - jaw, and hydraulic pullers. Choose the one that is suitable for the size and type of the bearing you're removing.
- Socket Wrench Set: Socket wrenches are used to loosen and tighten bolts and nuts. Make sure you have a set of different sizes to fit the fasteners on the pulley.
- Hammer and Punch: A hammer and punch can be used to gently tap on the bearing or its components to loosen them. However, be careful not to apply too much force, as this can damage the bearing.
- Cleaning Supplies: You'll need cleaning supplies such as a degreaser, a brush, and a clean cloth to clean the pulley and the bearing after removal.
Step - by - Step Removal Process
Step 1: Prepare the Work Area
First, clean the work area to prevent any dirt or debris from getting into the bearing or the pulley. Lay out all the tools you'll need within easy reach.
Step 2: Remove the Pulley Cover or Guard
If the pulley has a cover or guard, use a socket wrench to remove the bolts or screws holding it in place. Carefully lift off the cover and set it aside.
Step 3: Loosen the Pulley Bolts
Using a socket wrench, loosen the bolts that hold the pulley to the shaft. Depending on the design, there may be one or more bolts. Make sure to keep track of the bolts and washers, as you'll need to reinstall them later.
Step 4: Separate the Pulley from the Shaft
Once the bolts are loosened, gently tap on the pulley with a hammer and punch to separate it from the shaft. Be careful not to damage the shaft or the pulley during this process.
Step 5: Select the Right Puller
If the bearing is still attached to the shaft or the pulley, you'll need to use a bearing puller. Select a puller that is the right size and type for the bearing. For example, if the bearing is a small ball bearing, a two - jaw puller may be sufficient. For larger or more stubborn bearings, a three - jaw or hydraulic puller may be required.
Step 6: Attach the Puller
Attach the puller to the bearing according to the manufacturer's instructions. Make sure the puller is centered and securely attached to the bearing.
Step 7: Apply Pressure
Using the puller, apply pressure gradually to the bearing. This will cause the bearing to be pulled off the shaft or out of the housing. Be patient and apply the pressure evenly to avoid damaging the bearing or the surrounding components.
Step 8: Remove the Bearing
Once the bearing is loose, carefully remove it from the shaft or the housing. Inspect the bearing for any signs of damage, such as cracks, wear, or corrosion. If the bearing is damaged, it should be replaced.
Step 9: Clean the Pulley and Shaft
After removing the bearing, clean the pulley and the shaft using a degreaser and a brush. This will remove any dirt, grease, or debris that may have accumulated. Wipe the surfaces dry with a clean cloth.
Troubleshooting
Sometimes, you may encounter difficulties during the bearing removal process. Here are some common problems and their solutions:


- Bearing is Stuck: If the bearing is stuck, you can try applying a penetrating oil to the bearing and letting it soak for a few hours. This can help loosen the rust or debris that is holding the bearing in place. You can also try heating the bearing slightly with a heat gun, but be careful not to overheat it, as this can damage the bearing.
- Puller is Not Working: If the puller is not working properly, make sure it is attached correctly and that the jaws are gripping the bearing tightly. You may need to adjust the puller or try a different type of puller.
Reinstallation
Once you've removed and inspected the bearing, you can reinstall it if it is in good condition. Here are the steps for reinstallation:
- Clean the New Bearing: If you're using a new bearing, clean it with a degreaser and a clean cloth to remove any protective coating or debris.
- Apply Lubricant: Apply a thin layer of lubricant to the bearing and the shaft. This will help reduce friction and ensure smooth operation.
- Install the Bearing: Use a press or a suitable tool to install the bearing onto the shaft or into the housing. Make sure the bearing is properly seated and aligned.
- Reassemble the Pulley: Reattach the pulley to the shaft and tighten the bolts using a socket wrench. Make sure the bolts are tightened to the correct torque specification.
- Replace the Cover or Guard: Put the pulley cover or guard back in place and secure it with the bolts or screws.
Conclusion
Removing pulley bearings safely requires the right tools, knowledge, and precautions. By following the steps outlined in this blog, you can remove pulley bearings without causing damage to the bearings, the pulley, or yourself. As a supplier of high - quality pulley bearings, we are committed to providing you with the best products and support. If you have any questions about pulley bearings or the removal process, or if you're interested in purchasing our products, please feel free to contact us for further discussion. We look forward to serving you and meeting your pulley bearing needs.
References
- Machinery's Handbook, 31st Edition
- Bearing Installation and Removal Guide, SKF
- Automotive Repair Manuals